DIY Pet Door Installation
Frequently, homeowners want a dog door located in an area that requires professional installation to ensure a safe, properly functioning, and aesthetically attractive dog door. However, if you’re entirely comfortable with the DIY dog door process, you may prefer to save on the cost by installing your dog door yourself. Here’s some very general guidance for the DIY dog door installation process.
DIY Dog Door Installation
Below is the essential step-by-step process for installing a dog door in your home. (The process is nearly the same for a DIY cat door with just a few small differences.) The basic steps for dog door installation in an existing sliding glass door on your home are done in two stages — Preparation and Installation.
How To Prepare For Installing A Dog Door
Start by deciding which pet door style, size, and door flap option is best for your pet and home. For a more active dog, choose a heavier-duty design.
Measure the dimensions
To achieve proper functioning of your pet door and optimum comfort for your dog, take these measurements and then use them to cut the opening for your pet door:
- Height: The top edge of the pet door flap should be 1 inch or more above the tallest part of your dog’s back.
- Width: The pet door should be around 2 inches wider than your dog’s widest body measurement.
- Step-Over: This is the height of the bottom of the pet door opening from the floor. This should be a maximum of 1/3 of your dog’s height.
Choose a location
To select the best location for your pet door, consider:
- Accessibility: Ideally, place the dog door near your pet’s primary living space.
- Installation: Consider the challenges in installing a dog door in the kind of exterior door in which you want to put it.
- Appearance: Consider the aesthetics of placing the pet door in the location you have in mind and arrange for increased traffic in the area of the new pet entry.
Gather the tools you’ll need
See the manufacturer’s detailed instructions for installing the specific pet door you’ve purchased. Generally speaking, you can expect to need these tools:
- Protective eyewear
- Work gloves
- Tape Measure
- Pencil
- Masking Tape
- Jigsaw
- Screwdriver
- Drill & Drill Bits
- Level
How to Install Your Sliding Glass Pet Doors?
You can view the DIY Installation video and also follow along in the steps below:
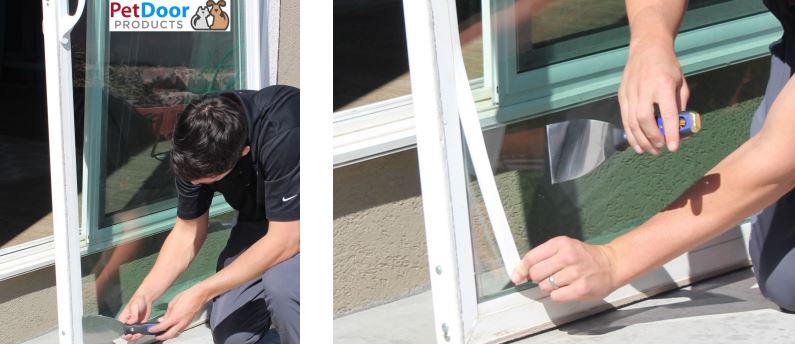
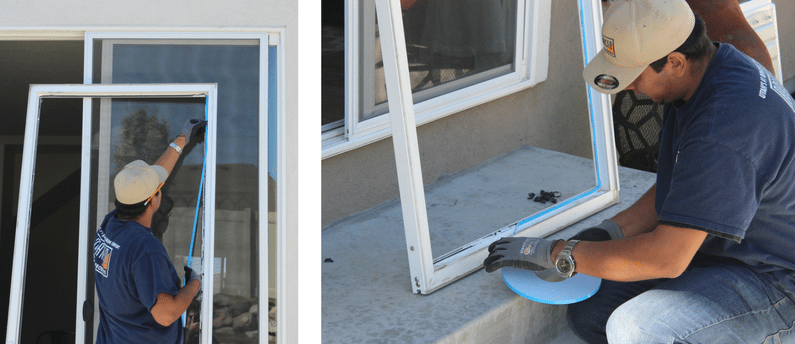
Step 1 :- Remove All 4 Glass Stops Using a Putty Knife or Similar Tool.
Insert the putty knife into the seam between the stop and door frame. Gently tap and pull stop out of its slot then completely remove them. Set these aside in a safe place. You will reinstall them at the end of the installation.
Step 2 :- Separate Glazing Tape Between the Glass and Frame
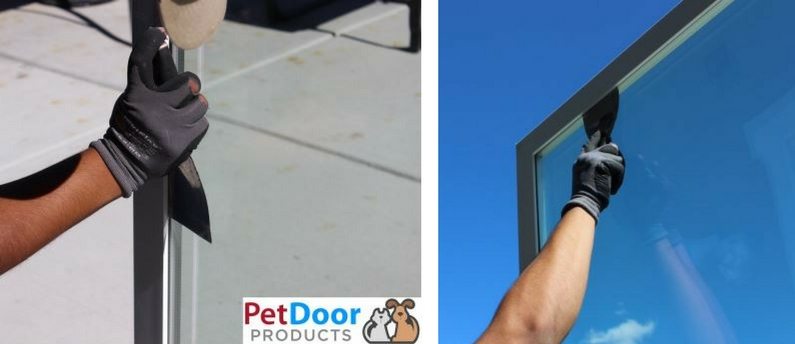
Use a putty knife or razor knife to separate the glass from the frame. Insert the knife under the frame on the backside of the door (opposite the side where the glass stops go. Slide the knife around the entire frame until the glass unit is free. Be careful not to drop the glass unit as you are freeing it from the from.
Step 3 :- Remove Existing Glass from Frame
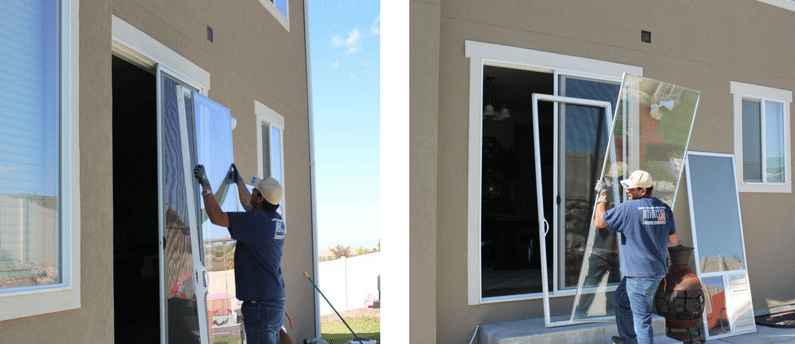
Carefully tip the top of the glass unit out of the frame towards your body. Then lift out the glass unit. Place the glass unit in a safe place for disposal.
Step 4 :- Remove Old Glazing Tape Around Inside Edge of Sliding Door Frame
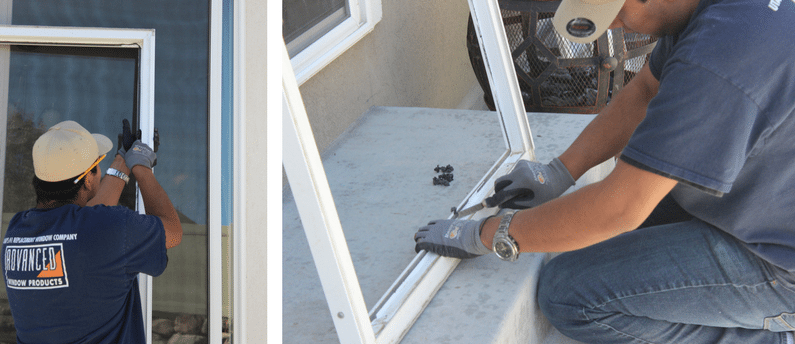
Using a razor knife or putty knife, carefully scrape away the old glazing tape to clean up the frame. Be sure not to cut or damage the edges and outside of the frame.
Step 5 :- Apply Glazing Tape to the Door Frame
Apply glazing top along the inside of the door frame where the old tape used to be located. Ensure that the tape goes around the entire frame.
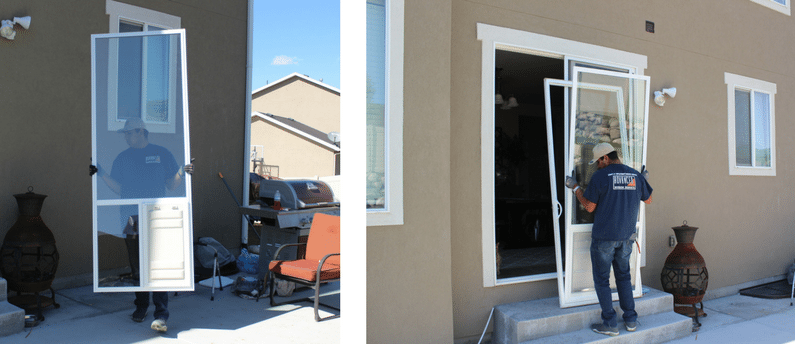
Step 6 :- Place Pet Door Insert Inside the Frame of Door Panel
First, ensure that your glass shims do not cover the slots for the glass stops. Then, carefully insert the bottom of the pet door unit. Once the bottom is fully inserted, work the pet door unit into the frame, applying pressure as you move up the frame. Push the pet door unit in snuggly until flush on all sides.
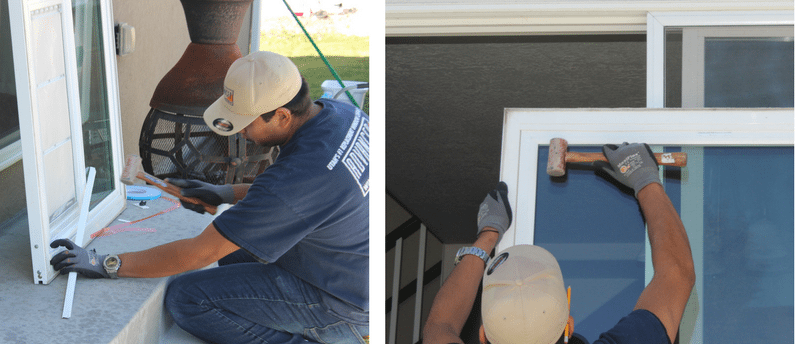
Step 7 :- Gently Tap 4 Glass Stops Back into Place
Using a soft mallet to gently tap the glass stops back into place. Make sure you do the longest ones first. All 4 pieces should fit back perfectly as before.
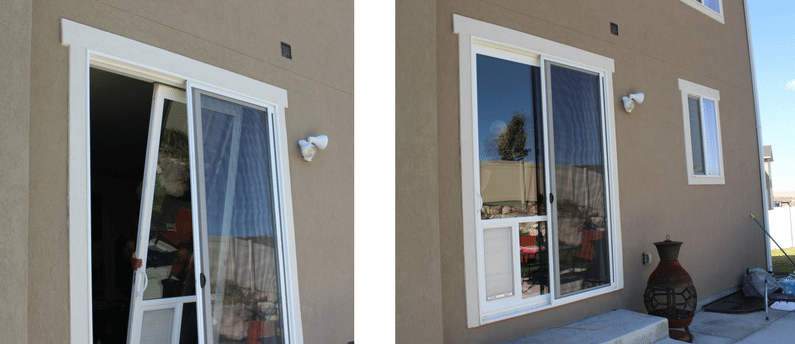
Step 8 :- Replace the door sash and you are done!
The whole door panel should slip into the frame. Start with the top and lift the panel over the bottom li
Frequently Asked Questions for DIY Pet Door Installation
Congratulations! You Have Succeeded!
Now that you have successfully installed and sealed your new dog door, it’s time to help your pet learn to use his or her new entryway!
Set Your Dog and Yourself Free with a Pet Door!
Pet Door Products in Salt Lake City Utah provides state-of-the-art pet doors for sliding glass doors. The weather seal and the vinyl and glass frame together make the Pet Door Products dog door impressively energy efficient. An optional security panel slides across the dog door opening, so you can control access at times when you do not want your pet to go out or in. Give your dog and yourself an exciting new level of freedom and convenience! For today’s best pet access solutions, contact Pet Door Products at (801) 973-8000, or use our online contact form for prompt assistance.
